Amazon Vendor Central Setup Guide
Obtaining the API Keys from Amazon Vendor Central
You can acquire the credentials needed for setting up your sales channel by visiting this page. Our page provides step-by-step guidance on obtaining these credentials, which are essential for the setup process.
Installing the Amazon Vendor Central Sales Channel
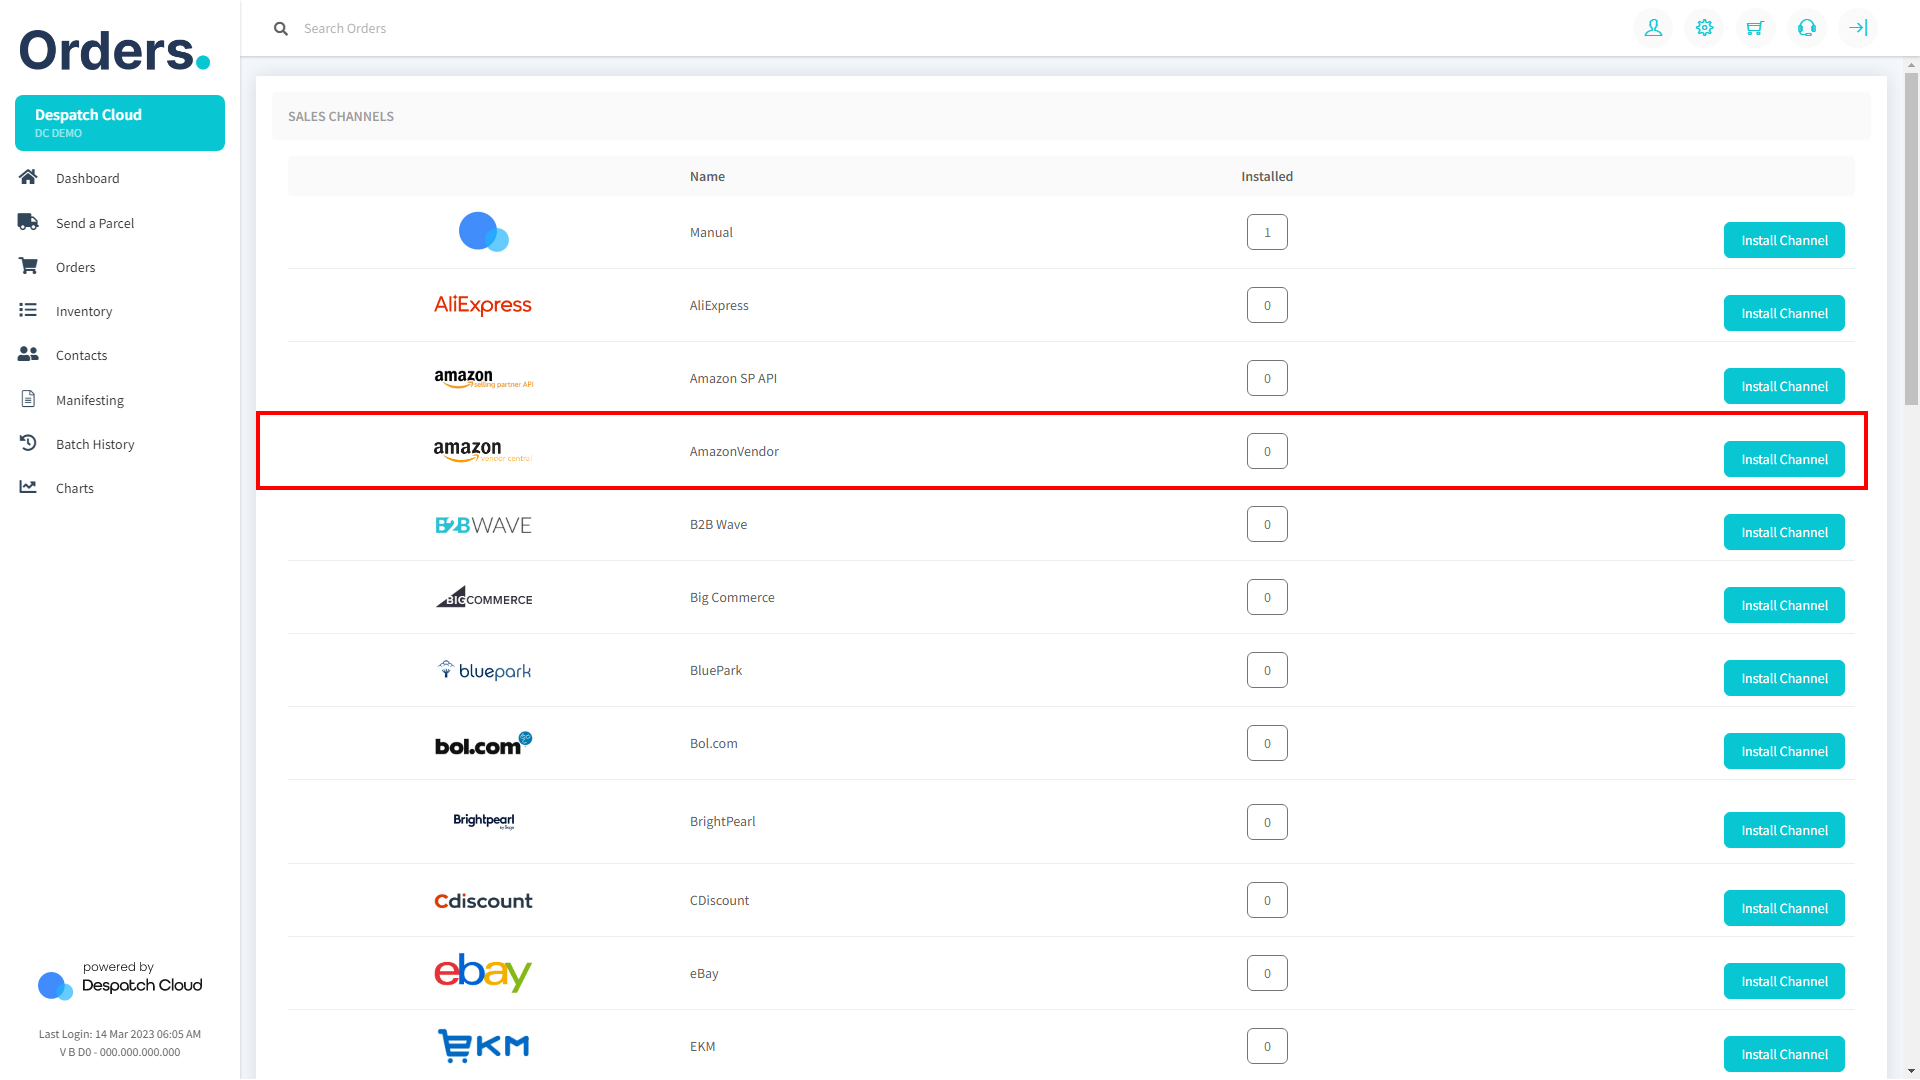
1. Start by opening your Orders account and logging in to your dashboard. Look for the "Settings" icon on the top-right corner of the page. Click on it to access the Sales Channels section.
2. Once you are in the Sales Channels section, you will see a list of available integrations. Look for "Amazon Vendor Central" and click the "Install Channel" button next to the Amazon Vendor Central logo to proceed with the installation.
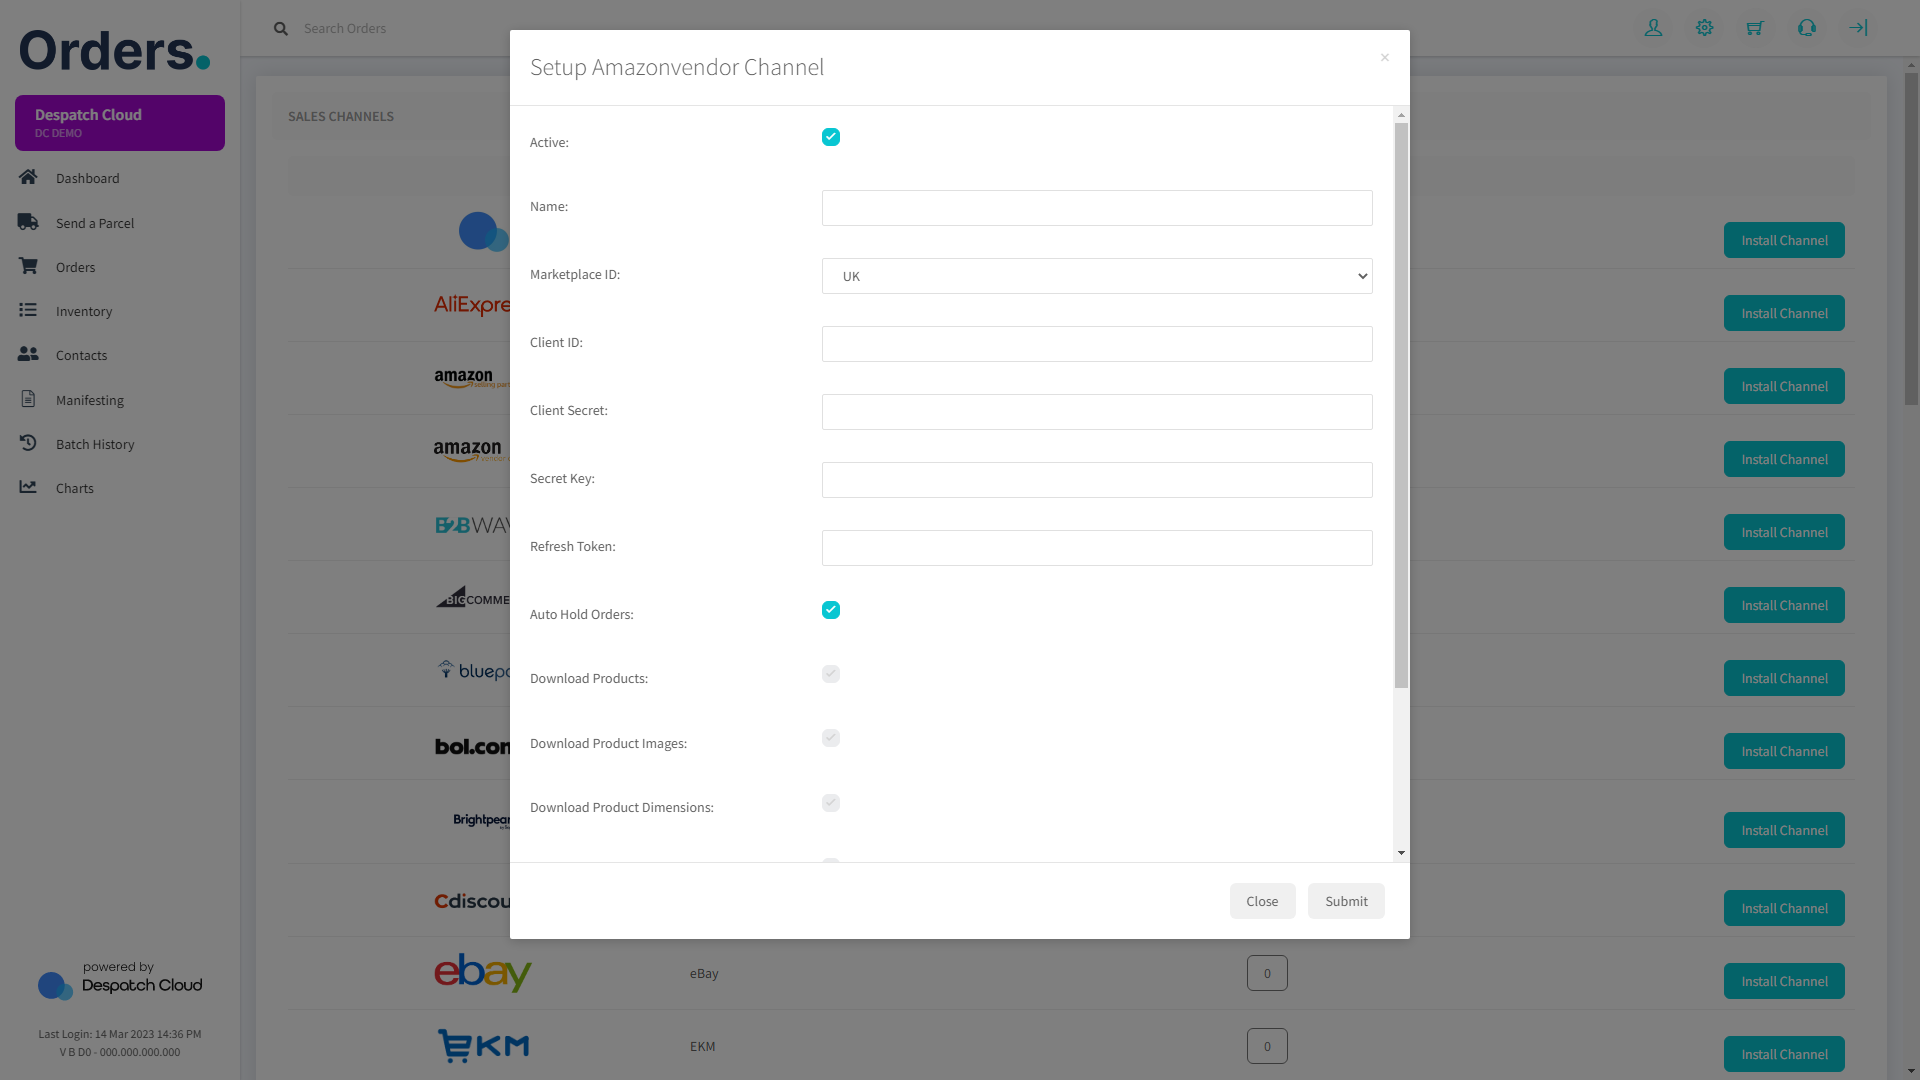
3. You will need to provide some information to complete the process.
- Name: In the field provided, you can enter any name. However, it is recommended to choose a name that has meaning to you, such as "Amazon Vendor Central," as it will serve as an apparent reference for the source of the order in the future.
- Marketplace ID: Please choose the country where your store is registered from the options in the drop-down menu.
- Client ID & Secret, Secret Key, Refresh Token: Please input the credentials you previously acquired from the Amazon Vendor Central platform.
Once you have filled in the required fields, click on the "Submit" button at the bottom-right corner of the screen.
4. Congratulations! You have now successfully set up your Amazon Vendor Central sales channel on Orders. You can now start selling your products on Amazon Vendor Central and manage your orders directly from your Orders dashboard.


