Throughout This Page
You can jump to the specified sections by clicking on these titles.
Overview
You'll discover thorough information on the General Settings options in this document. We'll delve into defaults, user management, and shipping rules.
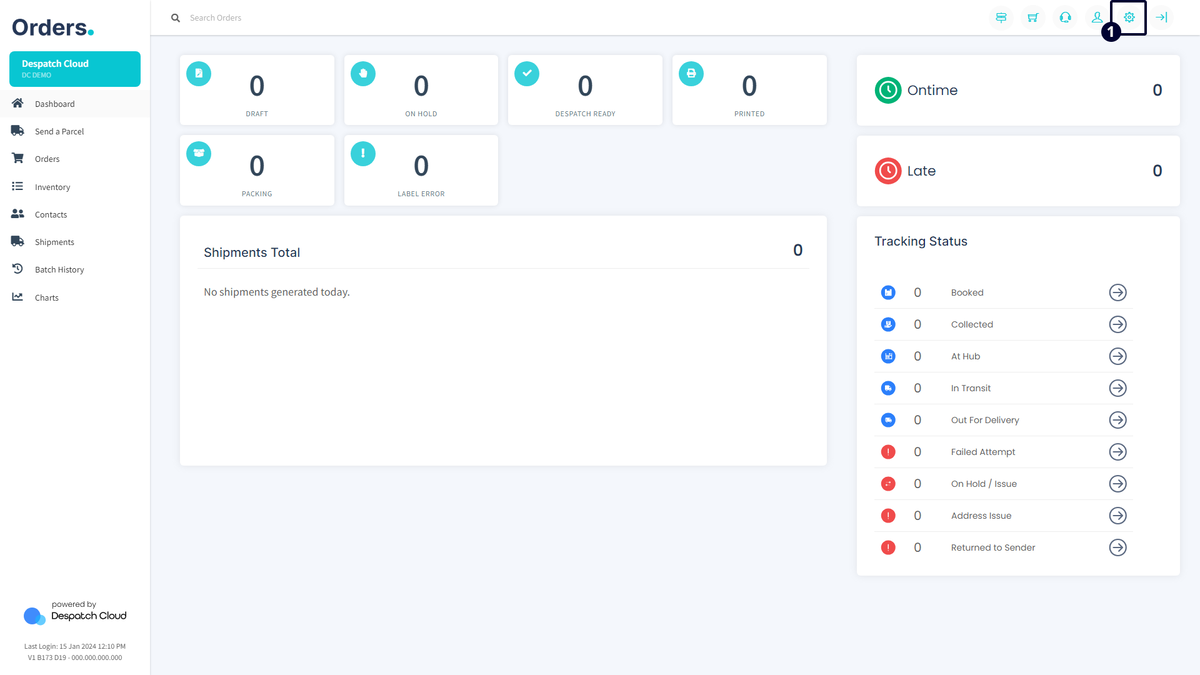
Accessing General Settings
To reach the General Settings, select "Settings" from the top right corner of the screen, as indicated in the highlighted section in the image below. Click the corresponding buttons to navigate the specific sections mentioned in this document.
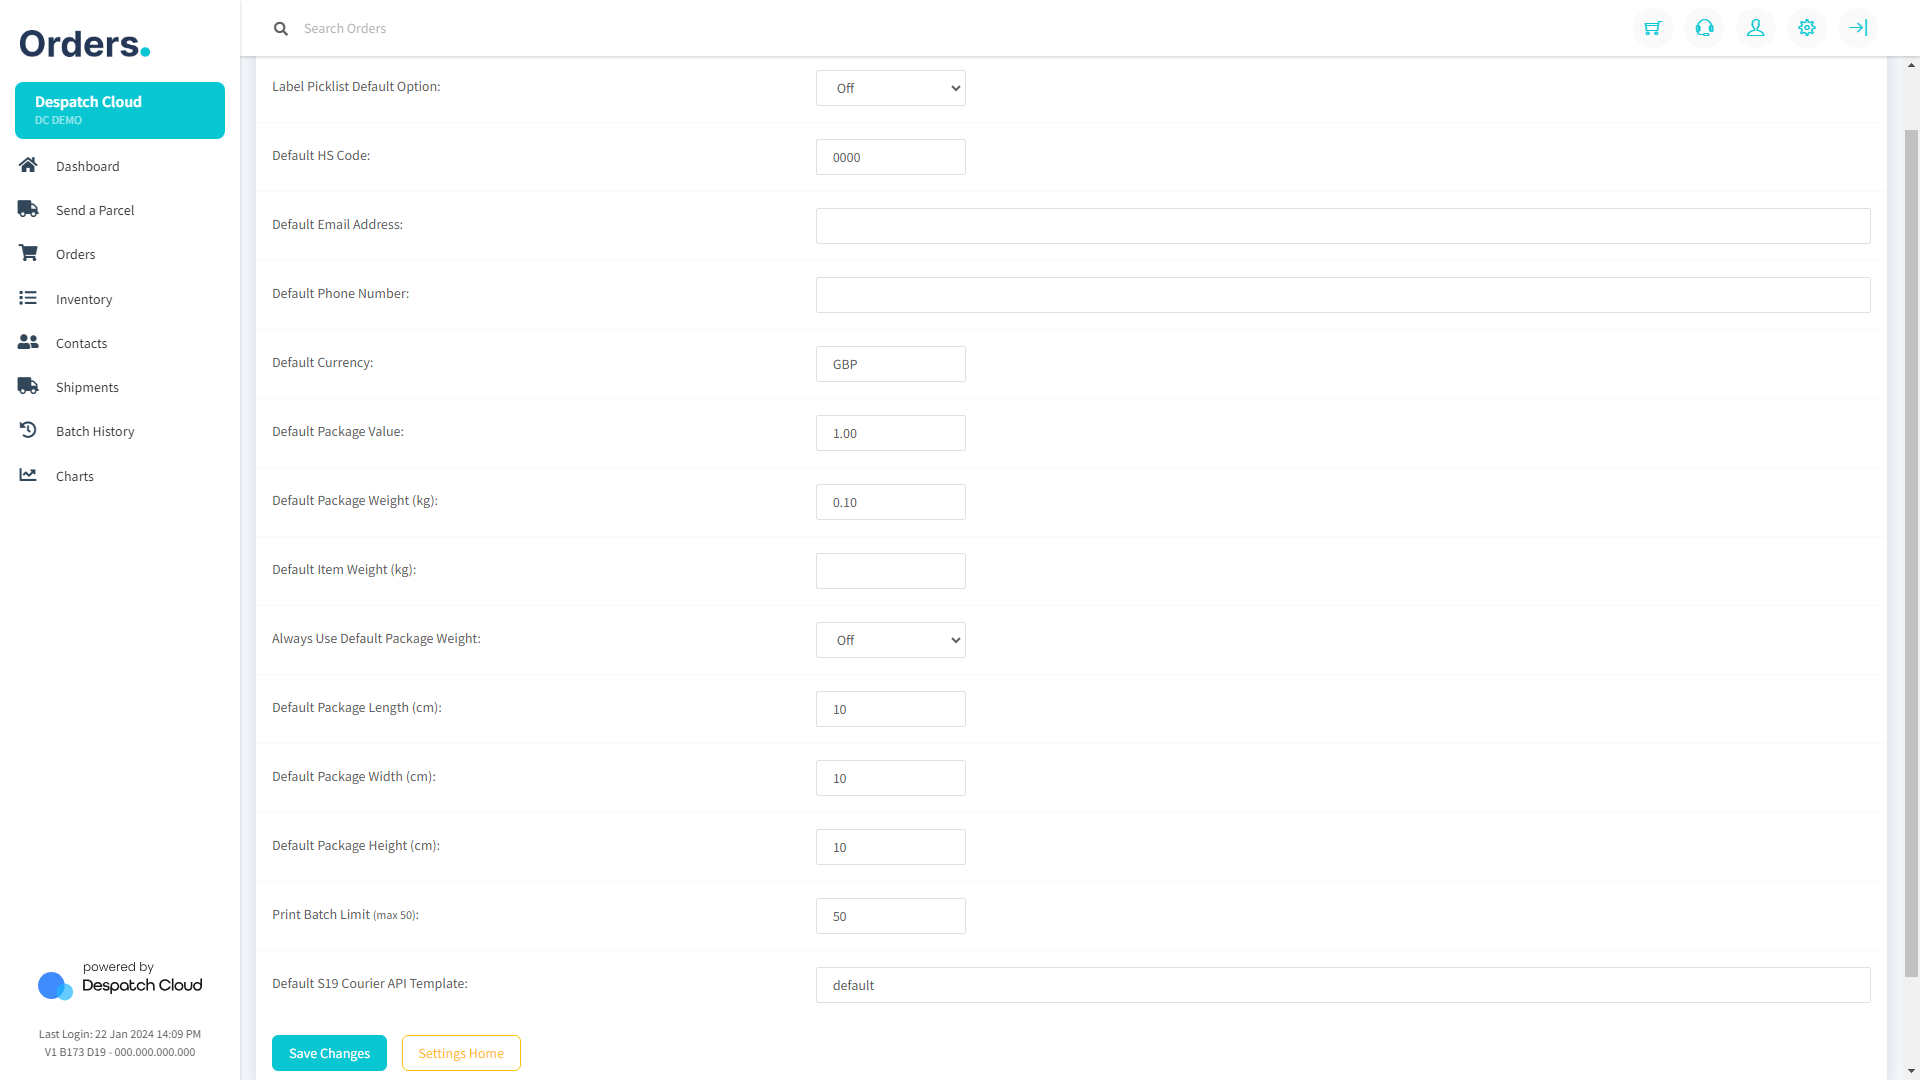
Defaults
The Defaults page enables you to establish default values and system settings. The options are elaborated as follows:
- Label Picklist Default Option: If turned on. this option automatically prints the picklist.
- Default HS Code: Sets the default Harmonized System (HS) code for product classification. If an item is shipped internationally and doesn't have a code in its configuration, this default value will be used instead.
- Default Email Address / Default Phone Number: The information you enter here will be used as your default company information on packages, covering any missing information.
- Default Currency: This field allows you to set the default currency for your orders.
- Default Package Value/Weight/Length/Width/Height: These fields will use any information you enter here if these details are left empty on the item inventory page. The measurements are in kilograms and centimetres.
- Always Use Default Package Weight: When set to "On," always use the default package weight. When set to "Off," use individual item weights when specified.
- Print Batch Limit: Sets the maximum number of labels that can be printed in a single batch.
- Default S19 Courier API Template: Sets the default template for the S19 Courier API. You can write the template name to change it through this field.
Remember to click the "Save Changes" button from the bottom of the page once you make any changes.
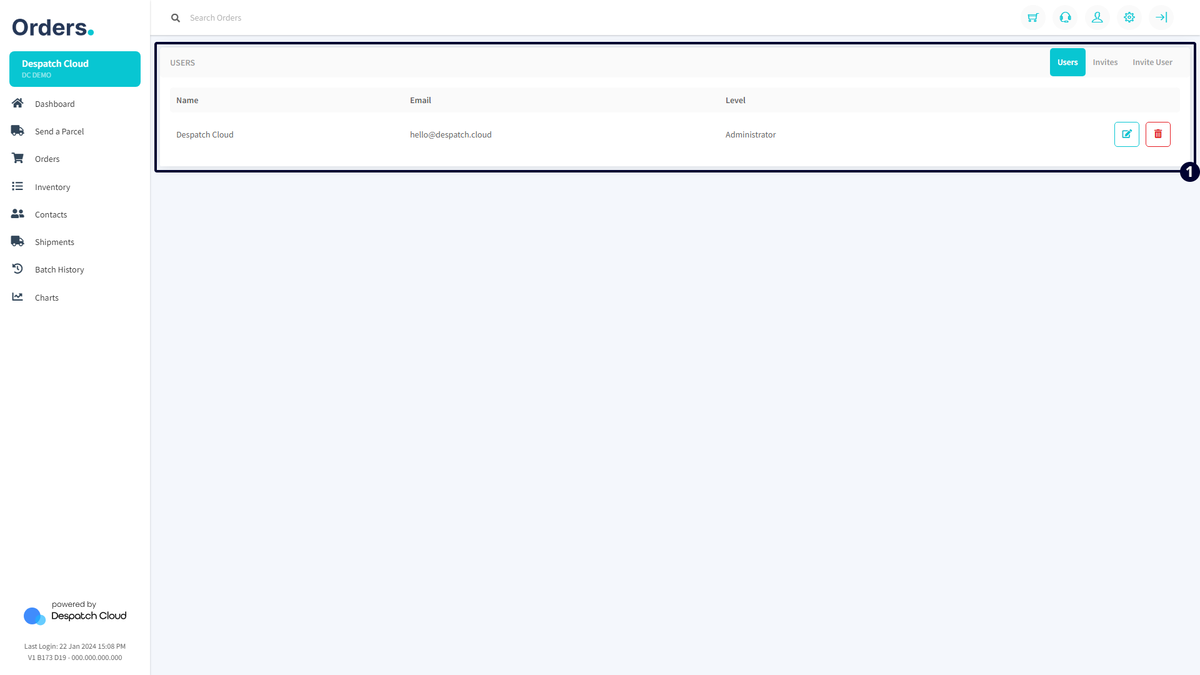
Users
You can oversee and create user accounts on the Users page for efficient platform management.
Editing Existing Users
Accessing the "Users" section through General Settings reveals a list of current users. Click the blue "Manage" icon next to a user to edit their information, and the red button on the right allows for user deletion. If you delete a user, a confirmation popup prevents accidental deletions. When you manage a user, the subsequent user management screen lets you modify the account name, staff level (based on your user level), and password. Save changes by clicking "Save User" at the bottom of the page.
Note that depending on your browser, you may need to log out and back in for the alterations to take effect.
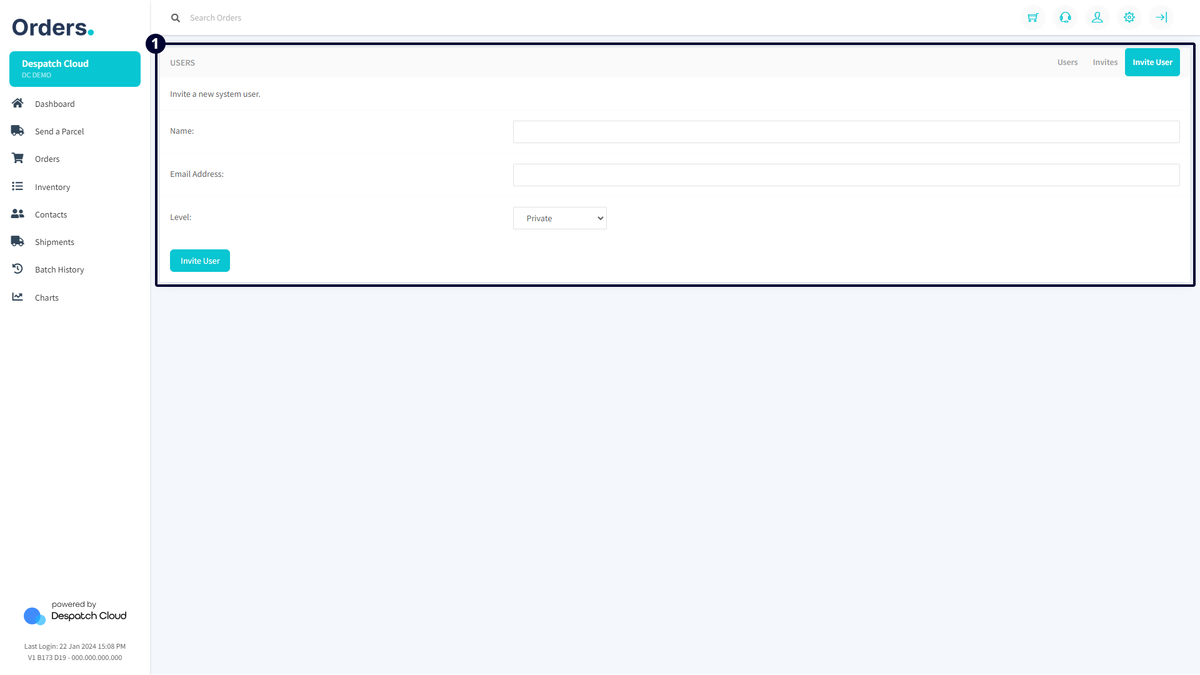
Creating New Users
To create new users, click the "Invite User" button at the top right corner of the screen. This action takes you to a page where you can configure the details for the new user.
In the "Name" field, input the desired account name for display on the Orders screen. Specify the email address for the user's login. Choose a user access level from Administrator, Advanced, Standard, Limited, or Private. Their access levels are explained below:
- Administrator: Has access to everything.
- Advanced: Has access to everything except the "User Setup" settings.
- Standard: Has access to everything except the "Settings" page.
- Limited: Only has access to the "Send a Parcel" and "All Orders" pages.
- Private: Only has access to the "Send a Parcel" page.
After filling in the necessary fields, click "Invite User" to send the invitation. A success message will confirm the action on the top right of the screen.
Upon sending the invitation, the new user receives an email containing instructions on setting up a password and starting using the platform immediately.
To manage invitations, navigate to the "Invites" tab through the Users page. If a user hasn't received an invitation email, you can resend it by clicking "Resend Invitation" under the "Status" tab. This comprehensive approach ensures effective user management within the platform. Here, you can also delete an invitation by clicking the trash bin icon to revoke the sign-up access to the invited user.
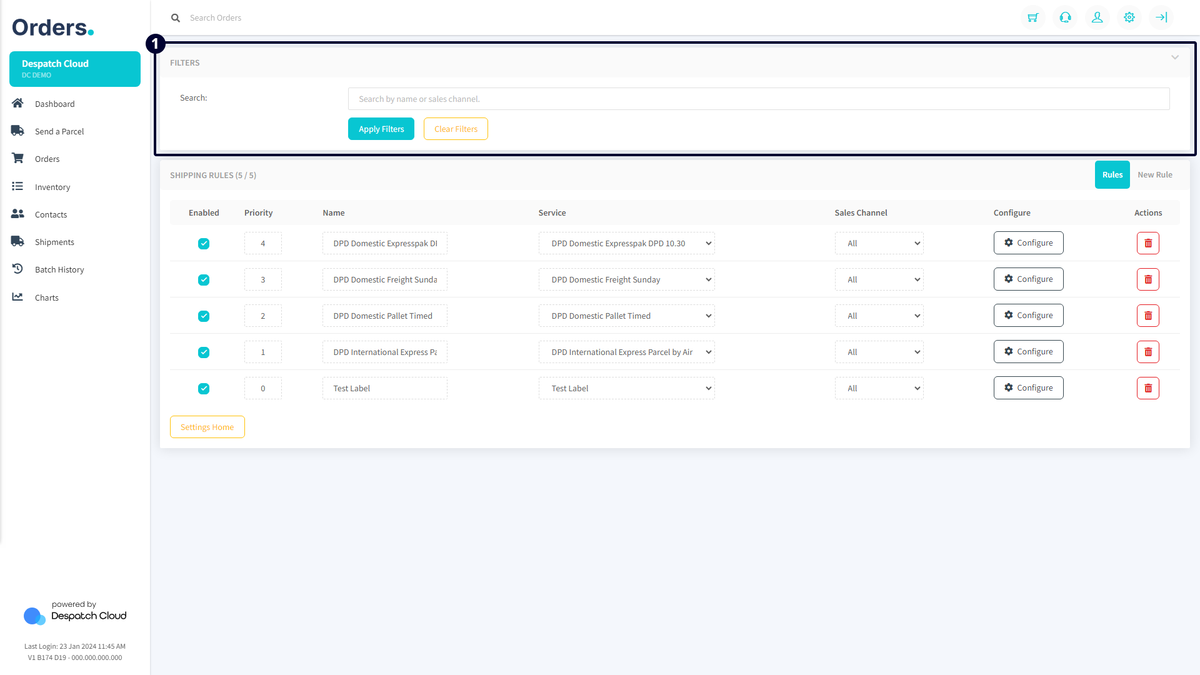
Shipping Rules
This feature allows you to create customised shipping rules based on various criteria, such as weights, dimensions, prices, destination countries, postcodes, and more, to automate your shipping workflow and reduce the risk of sending orders with the wrong shipping service.
A shipping rule is automatically generated without configured settings when you create or add a courier service. You can create new rules or edit existing ones and then configure the rules by adding conditions and specifying the corresponding shipping service that should be used.
Managing Shipping Rules
Atop the shipping rule page, a search filter enables you to refine shipping rules by either name or associated sales channel.
Below is the list of shipping rules consisting of several columns:
- Enabled: This column on the left shows a checkbox indicating whether the shipping rule is enabled or disabled. If a rule is disabled, it won't be available when despatching orders.
- Priority: It displays the numerical priority value for the rule. This value is used when two or more shipping rules overlap for a particular order. The lower the priority value (closer to 0), the higher the priority.
- Name: It displays the name in the drop-down menus when selecting the shipping service while despatching orders.
- Service: It is the courier service to which the shipping rule is linked.
- Sales Channel: This column provides a drop-down menu to specify whether the rule is linked to a single sales channel or all of them. It can be helpful when linking certain couriers for Amazon VTR.
- Configure: This button takes you to a more advanced view where you can configure the details and conditions for the shipping rule.
- Actions: The trash bin icon allows you to delete the shipping rule. Upon clicking, you will be asked to confirm this action through a popup window.
To generate fresh shipping rules, navigate to the "Rules" tab, assign a name to your new rule, choose the desired service as its foundation, and click the "Create Option" button. This action will establish the new shipping rule and return you to the "Rules" tab. Subsequently, you can customise the "Configure" button according to your requirements.
When configuring Shipping Rules, it is crucial to define the countries, as the courier will only be accessible for use when specific countries are designated. To allocate countries to a shipping rule, access the "Supported Countries" tab at the top-right of the configuration page. Choose the countries you intend to ship to, then click both the "Save Countries" and "Save Changes" buttons to implement the modifications.
Supported Countries in Action
To demonstrate the influence of country selection within the "Supported Countries" section, let's restrict the availability of the "Test Label" courier exclusively to the United Kingdom. Navigate to the "Supported Countries" tab and choose only the United Kingdom. Specifying the countries where you intend to utilise the courier is crucial, as the shipping rule will only be visible if this step is taken.
Upon accessing the "Send a Parcel" page through the left-hand menu, setting the shipping address to the United Kingdom, and clicking the shipping service drop-down menu, all configured services for the United Kingdom, including "Test Label," become visible. This confirms that the choice of supported countries directly impacts the available couriers in Orders. Furthermore, as illustrated in this example, each courier configuration you establish will be visible only for the selected countries.
