To setup a VendPos sales channel on Despatch Cloud, you must fill out the credentials then connect to the channel. To setup a VendPos sales channel on Despatch Cloud, follow the steps below:
1. Enter a name in the "Name" field. It could be anything you want as long as it wasn't used already. Also, enter the "Host Name", which is your VendPos store name.
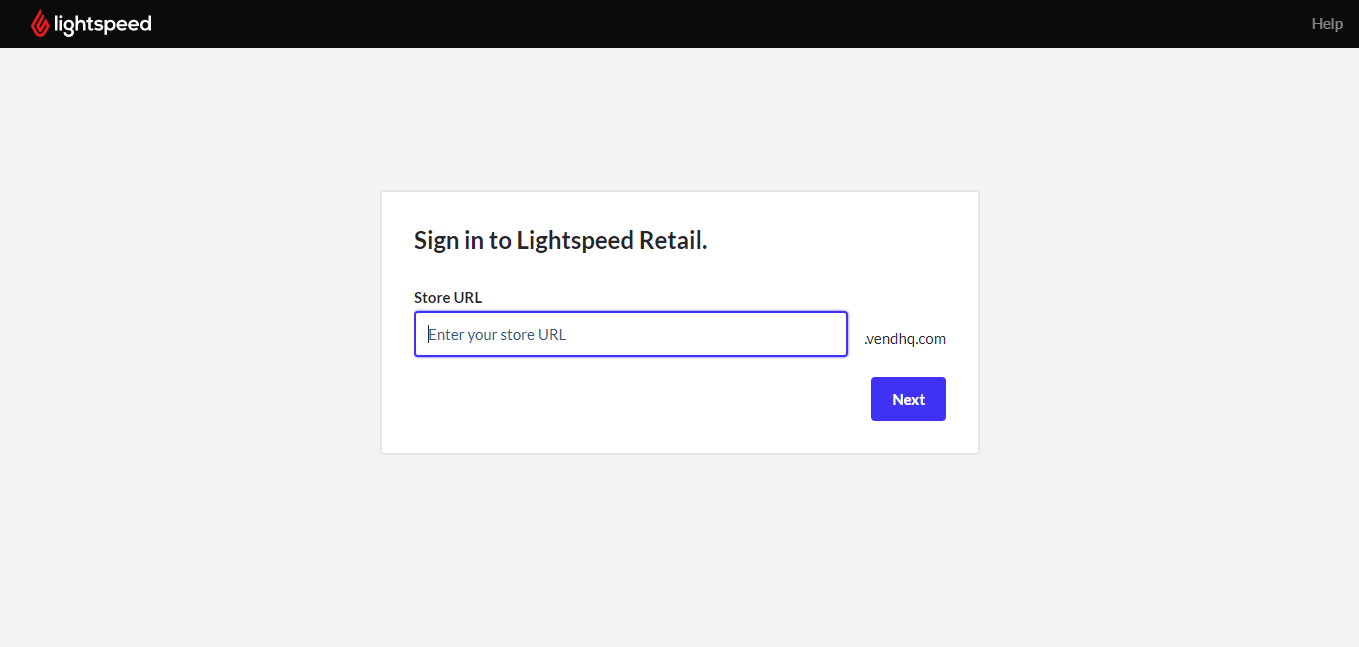
https://yourstorename.vendhq.com/
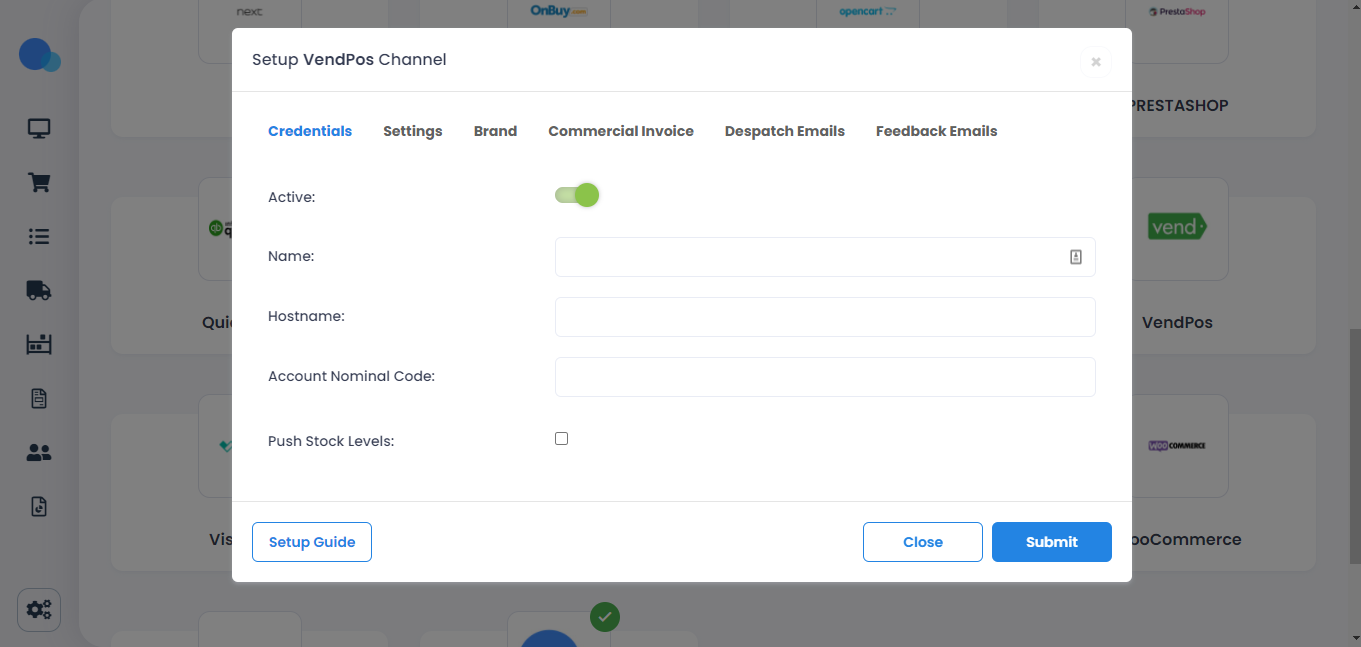
2. Then click on "Submit."

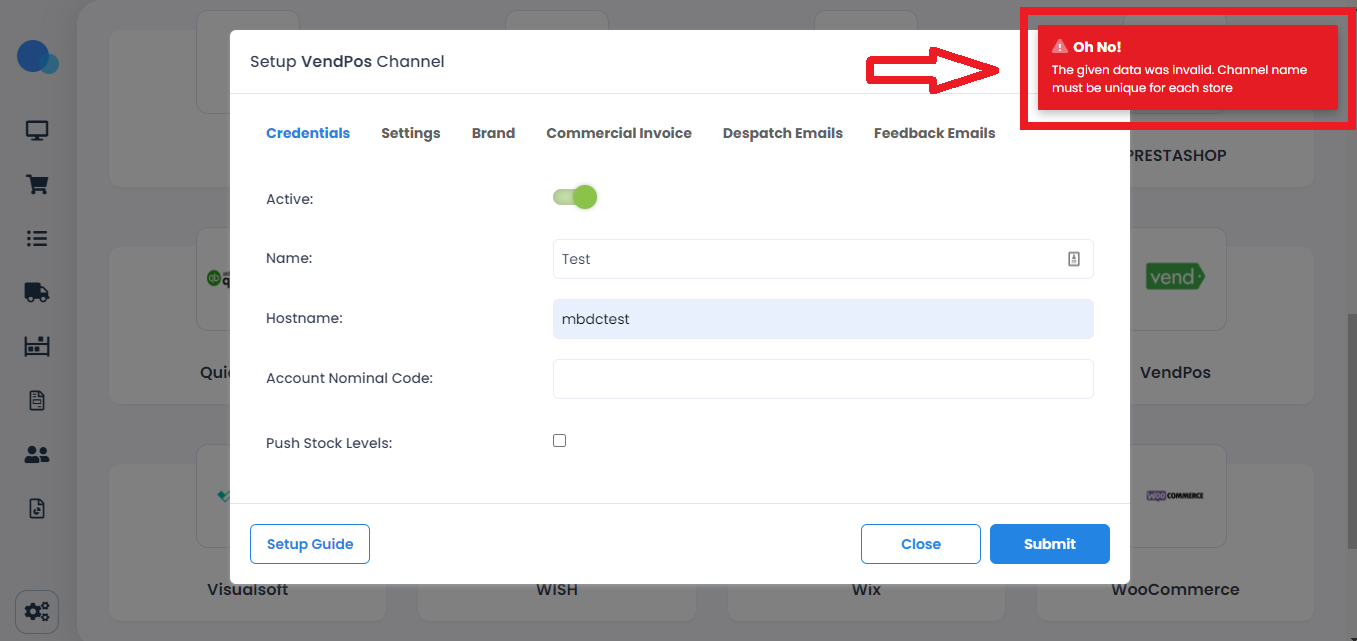
If you face an error as in the picture below, this means the name you picked is already taken, and you have to try another name.
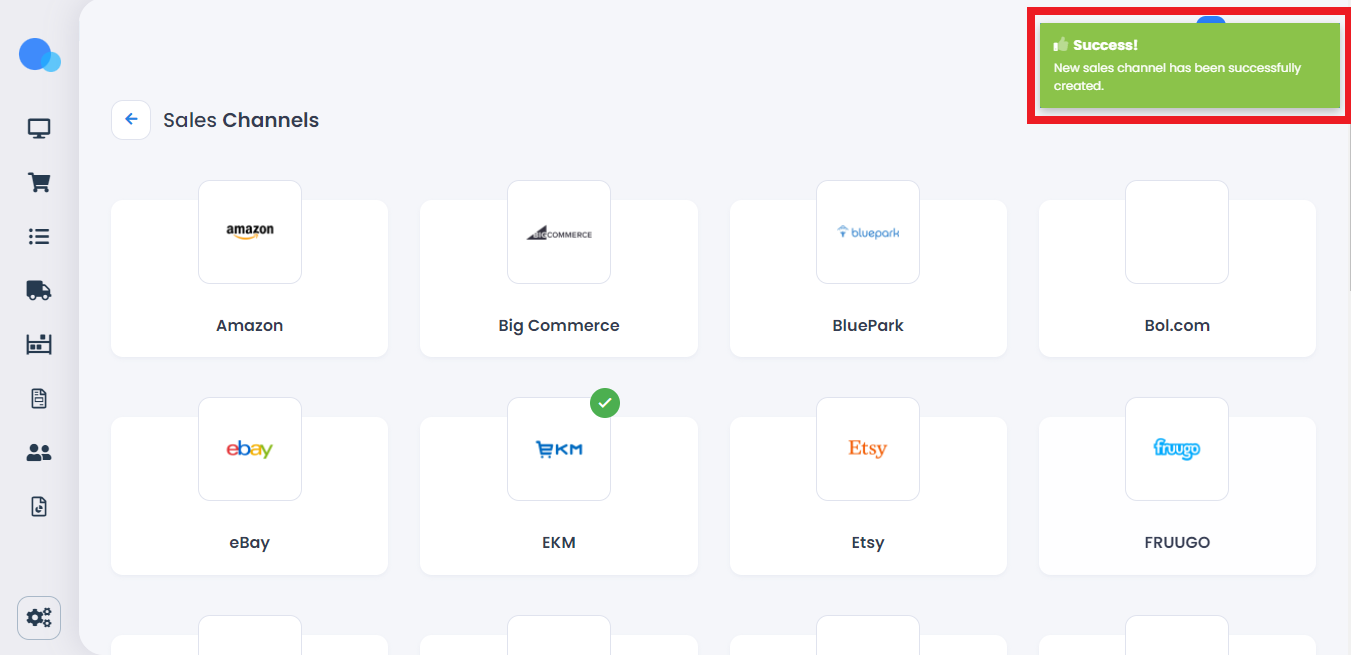
If you get a message like in the following picture, it means you created your channel successfully.
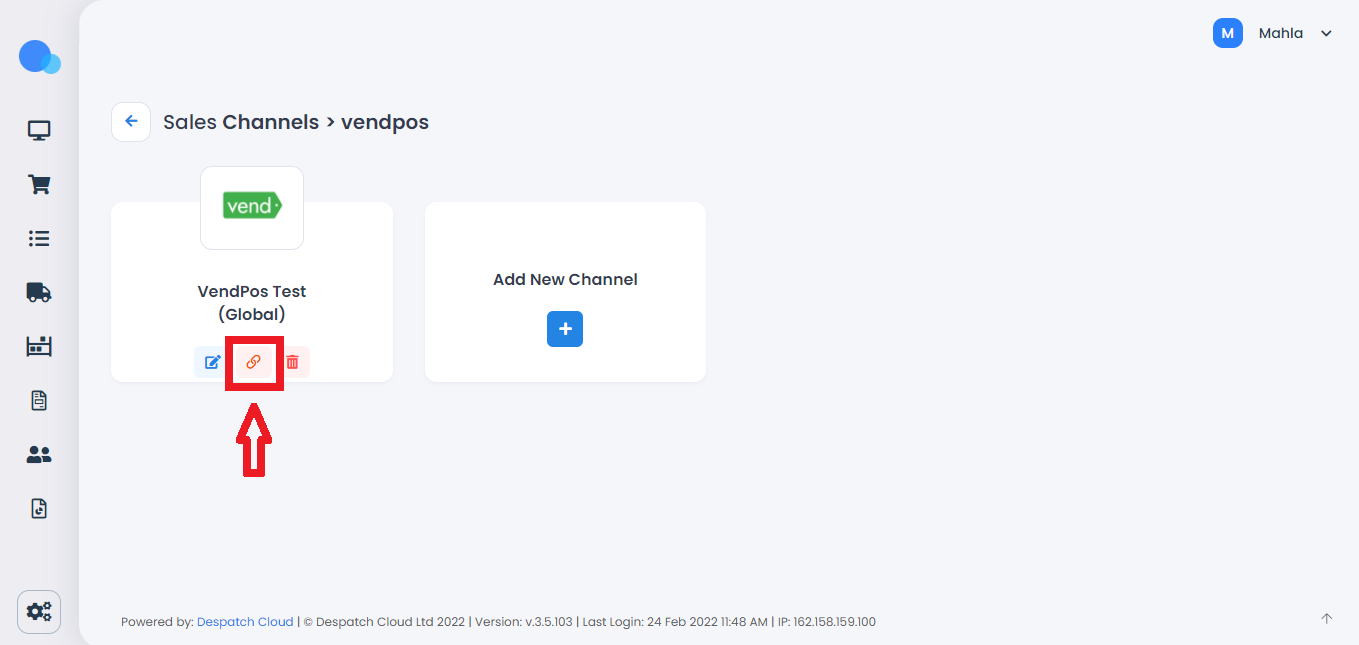
3. The next step is connecting the channel. In order to do that, click on the Link icon.
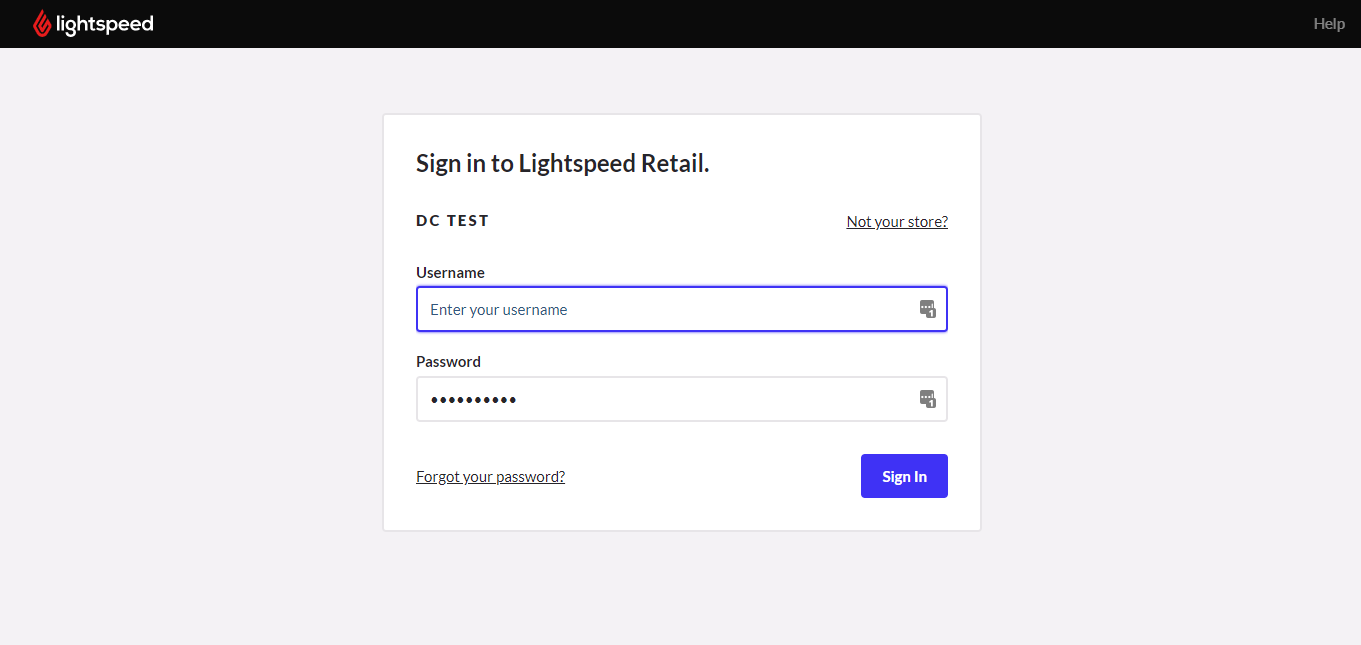
5. If you haven't logged in to VendPos already, you have to sign in to your account.
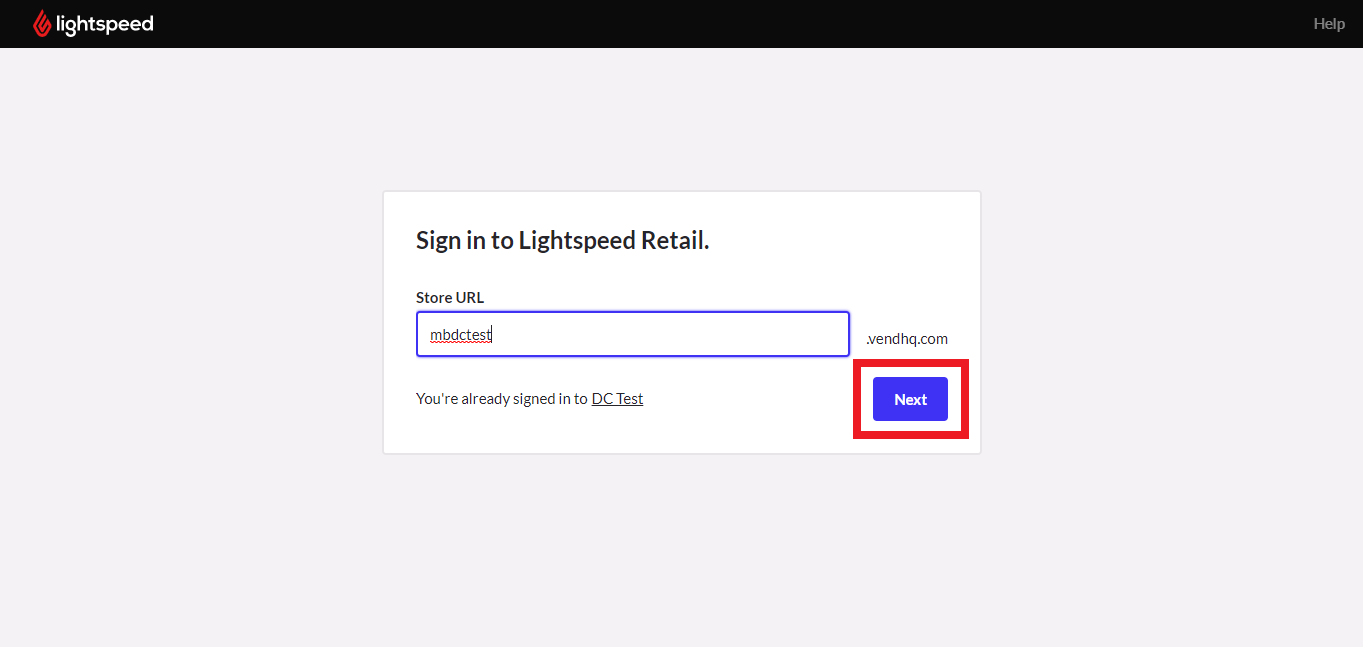
But, if you were already logged in to your VendPos account, If you click on "Next", you will directly see the message below.

6. Click on "Connect", and you will see the message below.
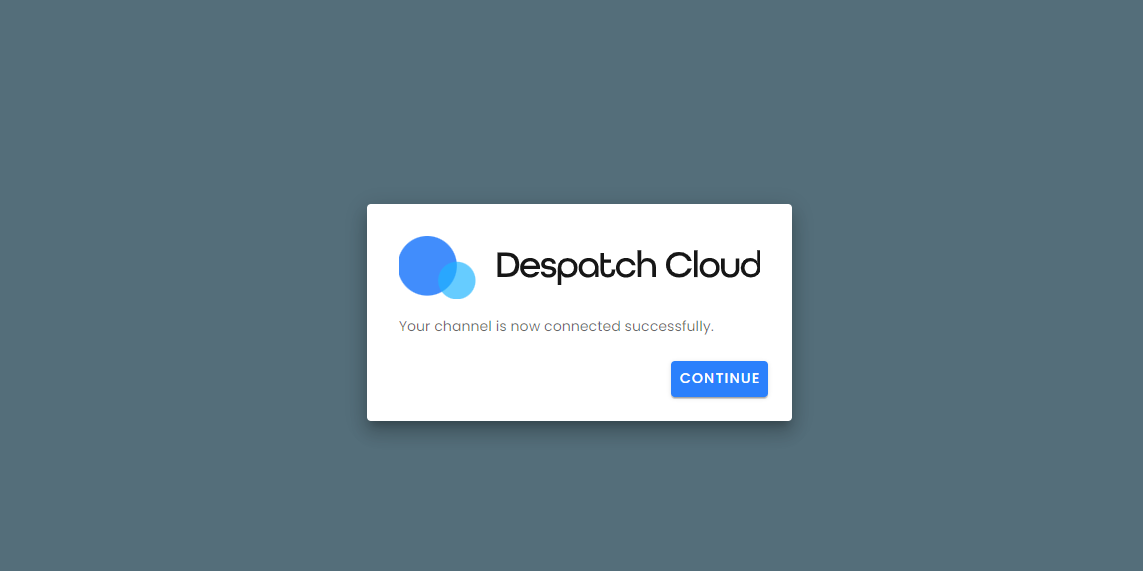
Now your VendPos sales channel is added and connected successfully.